
VueRouter
官网:https://router.vuejs.org/zh/
基本介绍

Vue Router:Vue 的官方路由。 为 Vue 提供富有表现力、可配置的、方便的路由
Vue 中的路由,主要定义的是路径与组件之间的对应关系
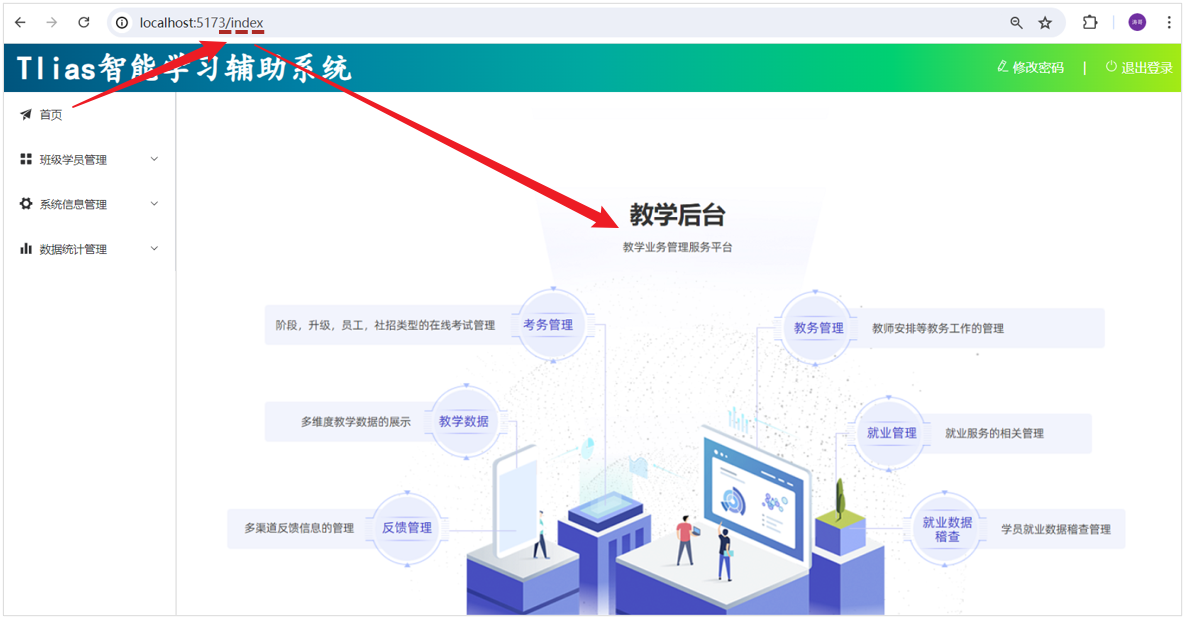
比如,我们打开一个网站,点击左侧菜单,地址栏的地址发生变化,地址栏地址一旦发生变化,在主区域显示对应的页面组件
VueRouter 主要由以下三个部分组成,如下所示
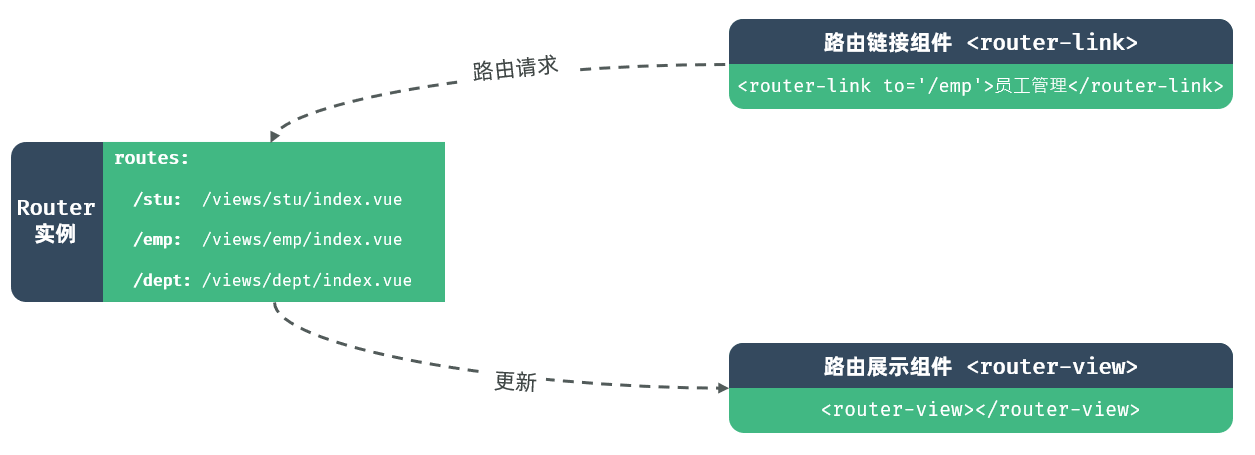
VueRouter:路由器类,根据路由请求在路由视图中动态渲染选中的组件
<router-link>:请求链接组件,浏览器会解析成<a>
<router-view>:动态视图组件,用来渲染展示与路由路径对应的组件
基础路由配置
(1)在 views/layout/index.vue 中,调整代码,具体调整位置如下
在左侧菜单栏的 <el-menu> 标签上添加 router 属性,这会让 Element Plus 的 <el-menu> 组件自动根据路由来激活对应的菜单项
使用 <router-view> 组件来渲染根据路由动态变化的内容
确保每个 <el-menu-item> 的 index 属性值与你想要导航到的路径相匹配
vue
<script setup>
// 无需额外导入,因为我们只是使用了 Element Plus 和 Vue Router 的基本功能
</script>
<template>
<div class="common-layout">
<el-container>
<!-- Header 区域 -->
<el-header class="header">
<span class="title">Tlias智能学习辅助系统</span>
<span class="right_tool">
<a href="">
<el-icon><EditPen /></el-icon> 修改密码 |
</a>
<a href="">
<el-icon><SwitchButton /></el-icon> 退出登录
</a>
</span>
</el-header>
<el-container>
<!-- 左侧菜单 -->
<el-aside width="200px" class="aside">
<el-menu router>
<!-- 首页菜单 -->
<el-menu-item index="/index">
<el-icon><Promotion /></el-icon> 首页
</el-menu-item>
<!-- 班级管理菜单 -->
<el-sub-menu index="/manage">
<template #title>
<el-icon><Menu /></el-icon> 班级学员管理
</template>
<el-menu-item index="/clazz">
<el-icon><HomeFilled /></el-icon>班级管理
</el-menu-item>
<el-menu-item index="/stu">
<el-icon><UserFilled /></el-icon>学员管理
</el-menu-item>
</el-sub-menu>
<!-- 系统信息管理 -->
<el-sub-menu index="/system">
<template #title>
<el-icon><Tools /></el-icon>系统信息管理
</template>
<el-menu-item index="/dept">
<el-icon><HelpFilled /></el-icon>部门管理
</el-menu-item>
<el-menu-item index="/emp">
<el-icon><Avatar /></el-icon>员工管理
</el-menu-item>
</el-sub-menu>
<!-- 数据统计管理 -->
<el-sub-menu index="/report">
<template #title>
<el-icon><Histogram /></el-icon>数据统计管理
</template>
<el-menu-item index="/emp">
<el-icon><InfoFilled /></el-icon>员工信息统计
</el-menu-item>
<el-menu-item index="/stu">
<el-icon><Share /></el-icon>学员信息统计
</el-menu-item>
<el-menu-item index="/log">
<el-icon><Document /></el-icon>日志信息统计
</el-menu-item>
</el-sub-menu>
</el-menu>
</el-aside>
<!-- 主展示区域 -->
<el-main>
<router-view></router-view>
</el-main>
</el-container>
</el-container>
</div>
</template>
<style scoped>
.header {
background-image: linear-gradient(
to right,
#00547d,
#007fa4,
#00aaa0,
#00d072,
#a8eb12
);
}
.title {
color: white;
font-size: 40px;
font-family: 楷体;
line-height: 60px;
font-weight: bolder;
}
.right_tool {
float: right;
line-height: 60px;
}
a {
color: white;
text-decoration: none;
}
.aside {
width: 220px;
border-right: 1px solid #ccc;
height: 730px;
}
</style>(2)在 router/index.js 中配置请求路径与组件之间的关系
js
import { createRouter, createWebHistory } from "vue-router";

import IndexView from "@/views/index/index.vue";
import ClazzView from "@/views/clazz/index.vue";
import StuView from "@/views/stu/index.vue";
import DeptView from "@/views/dept/index.vue";
import EmpView from "@/views/emp/index.vue";
import EmpReportView from "@/views/report/emp/index.vue";
import StuReportView from "@/views/report/stu/index.vue";
import LogView from "@/views/log/index.vue";
import LoginView from "@/views/login/index.vue";

const routes = [
  { path: "/index", component: IndexView },
  { path: "/clazz", component: ClazzView },
  { path: "/stu", component: StuView },
  { path: "/dept", component: DeptView },
  { path: "/emp", component: EmpView },
  { path: "/report/emp", component: EmpReportView },
  { path: "/report/stu", component: StuReportView },
  { path: "/log", component: LogView },
  { path: "/login", component: LoginView },
];

const router = createRouter({
  history: createWebHistory(),
  routes,
});

export default router;完善路由配置
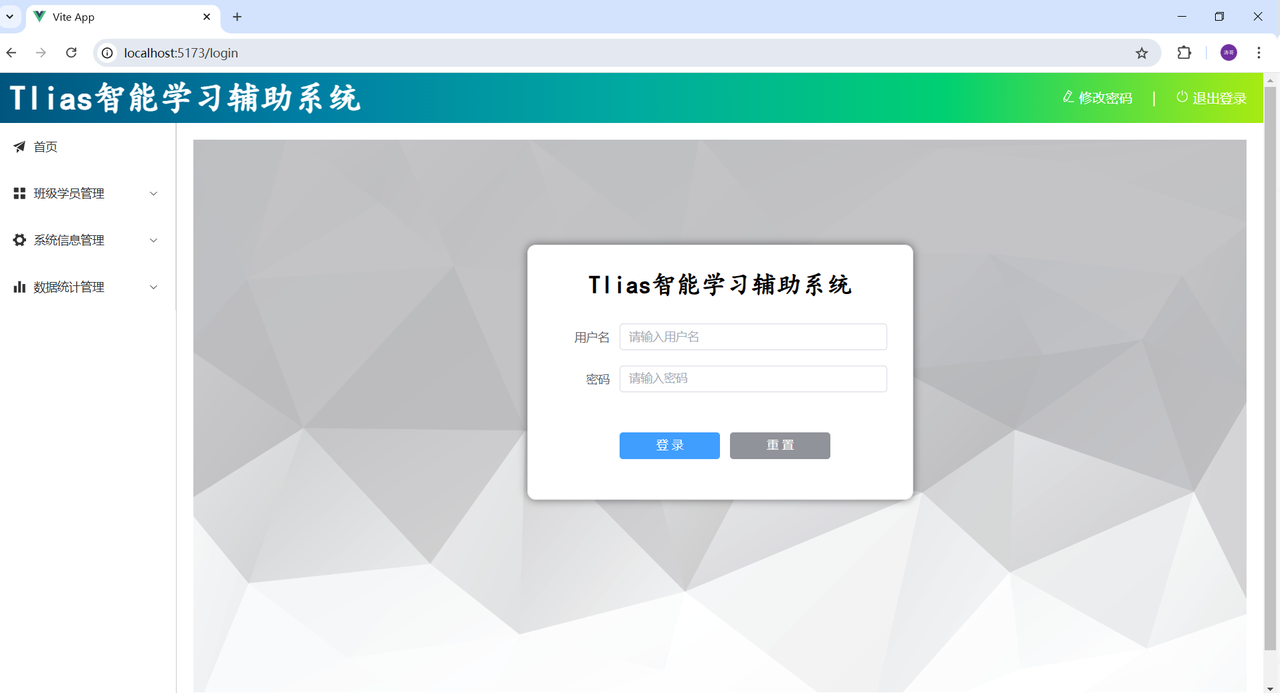
上述我们只是完成了最基本的路由配置。 并经过测试我们发现,如果我们访问 /login 路径,会发现,登录页面是在 layout 页面中嵌套展示的,这肯定是不合适的
配置嵌套路由,让不同的组件在 layout 页面中嵌套展示
默认访问的是根路径,只会展示 layout 页面,而不会展示其他的组件,为了实现在访问根路径时,默认访问 index 页面,需要配置从定向属性
最终配置形式如下,在 router/index.js 中做如下配置
js
import { createRouter, createWebHistory } from "vue-router";

import IndexView from "@/views/index/index.vue";
import ClazzView from "@/views/clazz/index.vue";
import DeptView from "@/views/dept/index.vue";
import EmpView from "@/views/emp/index.vue";
import LogView from "@/views/log/index.vue";
import StuView from "@/views/stu/index.vue";
import EmpReportView from "@/views/report/emp/index.vue";
import StuReportView from "@/views/report/stu/index.vue";
import LayoutView from "@/views/layout/index.vue";
import LoginView from "@/views/login/index.vue";

const router = createRouter({
  history: createWebHistory(import.meta.env.BASE_URL),
  routes: [
    {
      path: "/",
      name: "",
      component: LayoutView,
      redirect: "/index", //重定向
      children: [
        { path: "index", name: "index", component: IndexView },
        { path: "clazz", name: "clazz", component: ClazzView },
        { path: "stu", name: "stu", component: StuView },
        { path: "dept", name: "dept", component: DeptView },
        { path: "emp", name: "emp", component: EmpView },
        { path: "log", name: "log", component: LogView },
        { path: "/report/emp", name: "/report/emp", component: EmpReportView },
        { path: "/report/stu", name: "/report/stu", component: StuReportView },
      ],
    },
    { path: "/login", name: "login", component: LoginView },
  ],
});

export default router;修改根组件 App.vue
vue
<script setup></script>

<template>
  <router-view></router-view>
</template>

<style scoped></style>路由访问流程
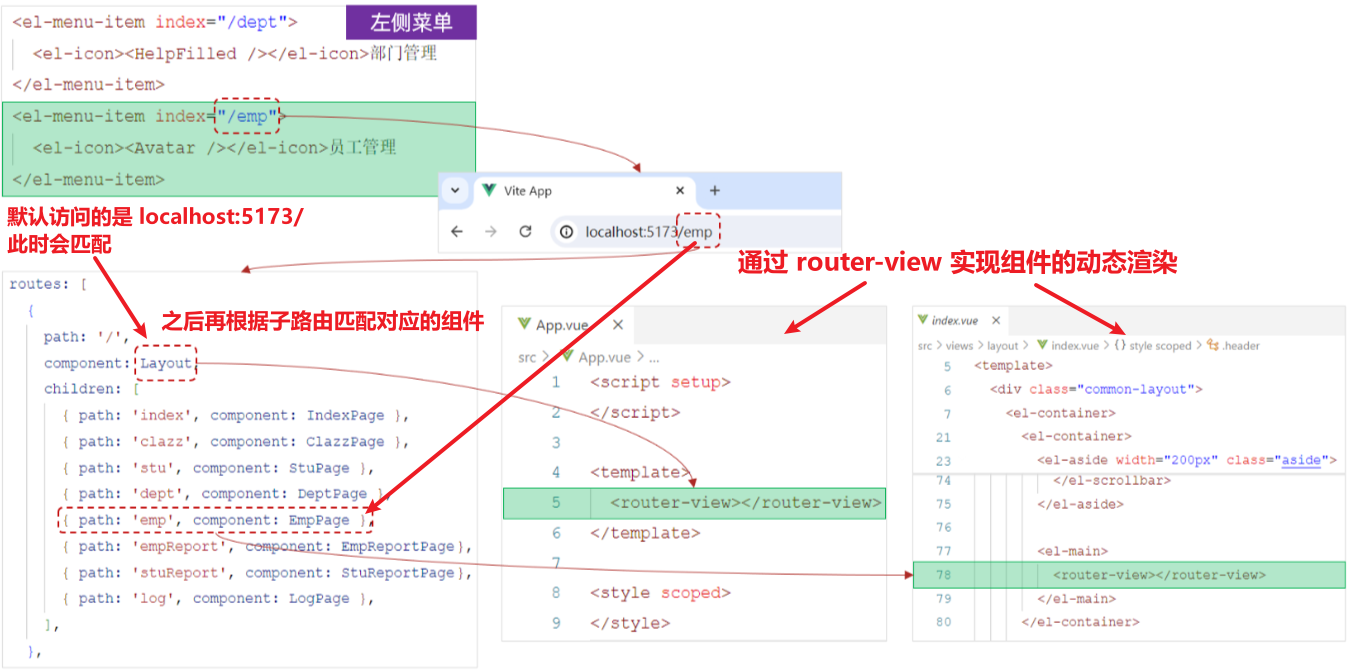
(1)当点击左侧菜单栏的员工管理菜单时,最终地址栏会访问路径 /emp
(2)此时 VueRouter,会自动的到所配置的路由表(router/index.js)中,查找与该路径对应的组件,并展示在路由展示组件 <router-view> 对应的位置中