
starter
基本介绍
所谓 starter 指的就是 SpringBoot 当中的起步依赖。在 SpringBoot 当中已经给我们提供了很多的起步依赖了,我们为什么还需要自定义 starter 起步依赖?
这是因为在实际的项目开发当中,我们可能会用到很多第三方的技术,并不是所有的第三方的技术官方都给我们提供了与 SpringBoot 整合的 starter 起步依赖,但是这些技术又非常的通用,在很多项目组当中都在使用
业务场景
我们前面案例当中所使用的阿里云 OSS 对象存储服务,现在阿里云的官方是没有给我们提供对应的起步依赖的,这个时候使用起来就会比较繁琐,我们需要引入对应的依赖。我们还需要在配置文件当中进行配置,还需要基于官方 SDK 示例来改造对应的工具类,我们在项目当中才可以进行使用
大家想在我们当前项目当中使用了阿里云 OSS,我们需要进行这么多步的操作。在别的项目组当中要想使用阿里云 OSS,是不是也需要进行这么多步的操作,所以这个时候我们就可以自定义一些公共组件,在这些公共组件当中,我就可以提前把需要配置的 bean 都提前配置好。将来在项目当中,我要想使用这个技术,我直接将组件对应的坐标直接引入进来,就已经自动配置好了,就可以直接使用了。我们也可以把公共组件提供给别的项目组进行使用,这样就可以大大的简化我们的开发
starter 介绍
在 SpringBoot 项目中,一般都会将这些公共组件封装为 SpringBoot 当中的 starter,也就是我们所说的起步依赖,而在 springboot 中,官方提供的起步依赖 或 第三方提供的起步依赖,基本都会包含两个模块
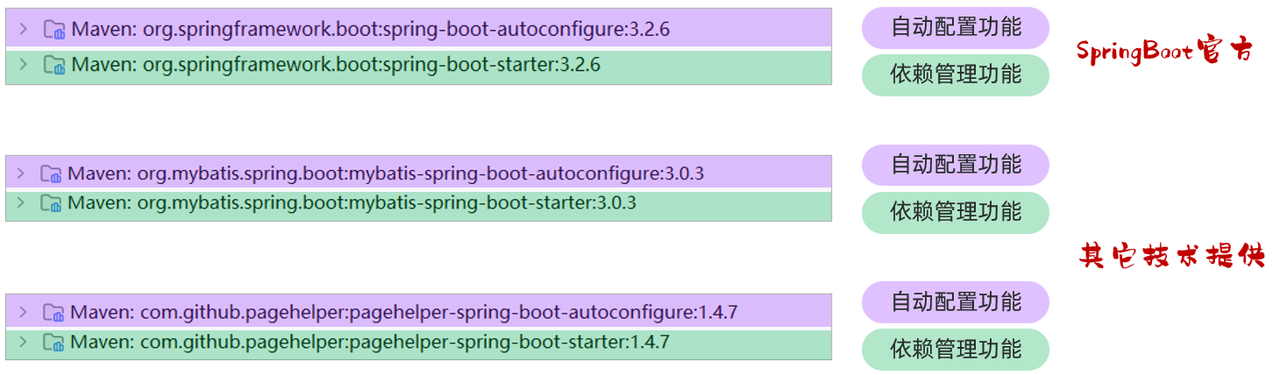
其中,spring-boot-starter 或 xxx-spring-boot-starter 这个模块主要是依赖管理的功能。 而 spring-boot-autoconfigure 或 xxxx-spring-boot-autoconfigure 主要是起到自动配置的作用,自动配置的核心代码就在这个模块中编写
Tip
SpringBoot 官方 starter 命名: spring-boot-starter-xxxx
第三组织提供的 starter 命名: xxxx-spring-boot-starter
而自动配置模块的核心,就是编写自动配置的核心代码,然后将自动配置的核心类,配置在核心的配置文件 META-INF/spring/org.springframework.boot.autoconfigure.AutoConfiguration.imports 中。 配置如下
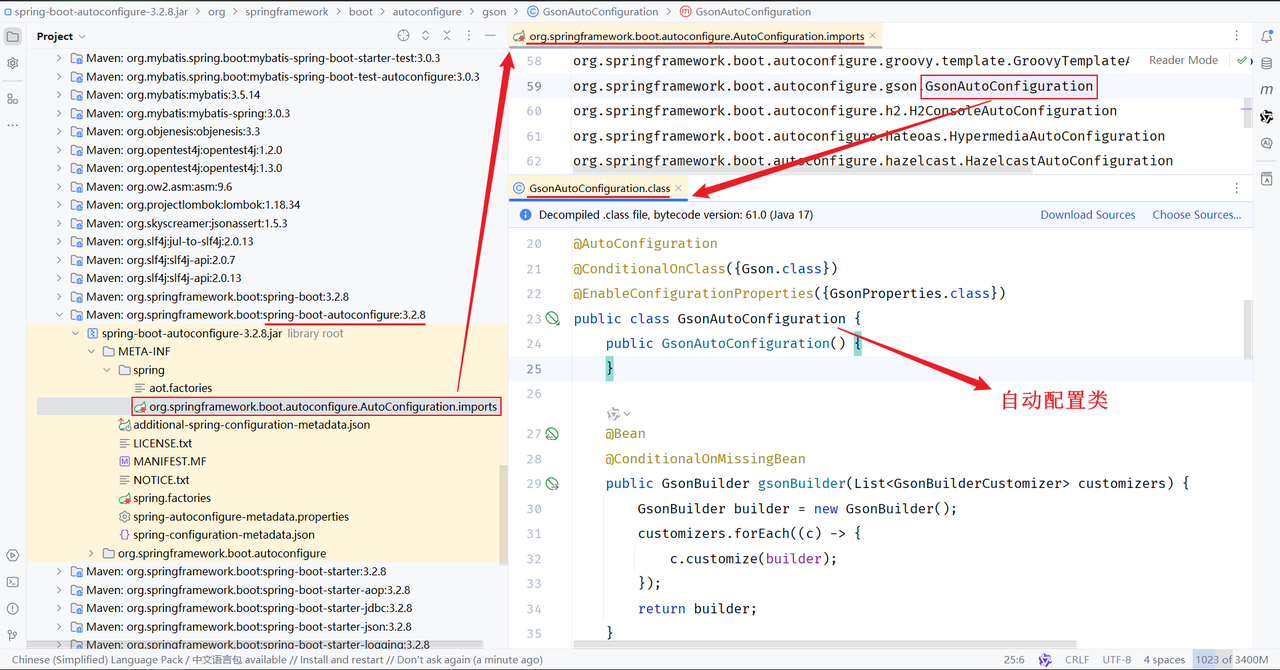
SpringBoot 官方的自动配置依赖 spring-boot-autoconfiure 中就提供了配置类,并且也提供了 springboot 会自动读取的配置文件。当 SpringBoot 项目启动时,会读取到 META-INF/spring/org.springframework.boot.autoconfigure.AutoConfiguration.imports 配置文件中的配置类并加载配置类,生成相关 bean 对象注册到 IOC 容器中
通过自动装配后,我们就可以直接在 SpringBoot 程序中使用自动配置的 bean 对象
starter 定义规范
自定义一个起步依赖 starter 的时候,按照规范需要定义两个模块
(1)starter 模块(进行依赖管理[把程序开发所需要的依赖都定义在 starter 起步依赖中])
(2)autoconfigure 模块(自动配置)
将来在项目当中进行相关功能开发时,只需要引入一个起步依赖就可以了,因为它会将 autoconfigure 自动配置的依赖给传递下来
案例实现
需求分析
需求:自定义 aliyun-oss-spring-boot-starter,完成阿里云 OSS 操作工具类 AliyunOSSOperator 的自动配置
目标:引入起步依赖引入之后,要想使用阿里云 OSS,注入 AliyunOSSOperator 直接使用即可
实现思路
第 1 步:创建自定义 starter 模块 aliyun-oss-spring-boot-starter(进行依赖管理)
把阿里云 OSS 所有的依赖统一管理起来
第 2 步:创建 autoconfigure 模块 aliyun-oss-spring-boot-autoconfigure
在 starter 中引入 autoconfigure (我们使用时只需要引入 starter 起步依赖即可)
第 3 步:在 autoconfigure 模块 aliyun-oss-spring-boot-autoconfigure 中完成自动配置
定义一个自动配置类,在自动配置类中将所要配置的 bean 都提前配置好
定义配置文件,把自动配置类的全类名定义在配置文件(META-INF/spring/xxxx.imports)中
实现步骤
创建 starter 模块
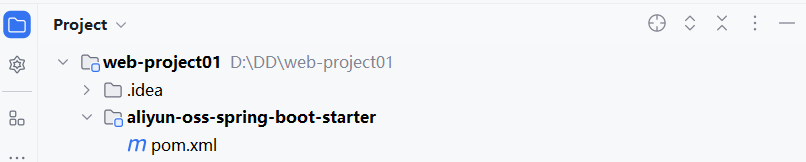
(1)创建 aliyun-oss-spring-boot-starter
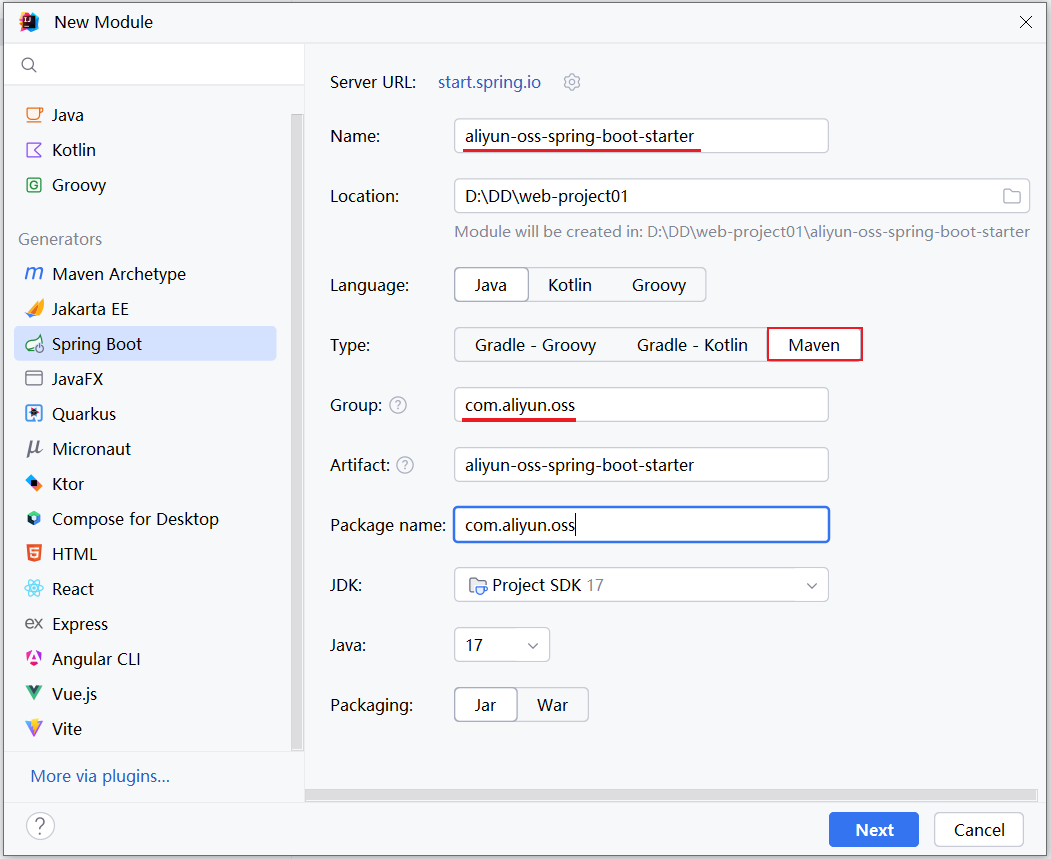
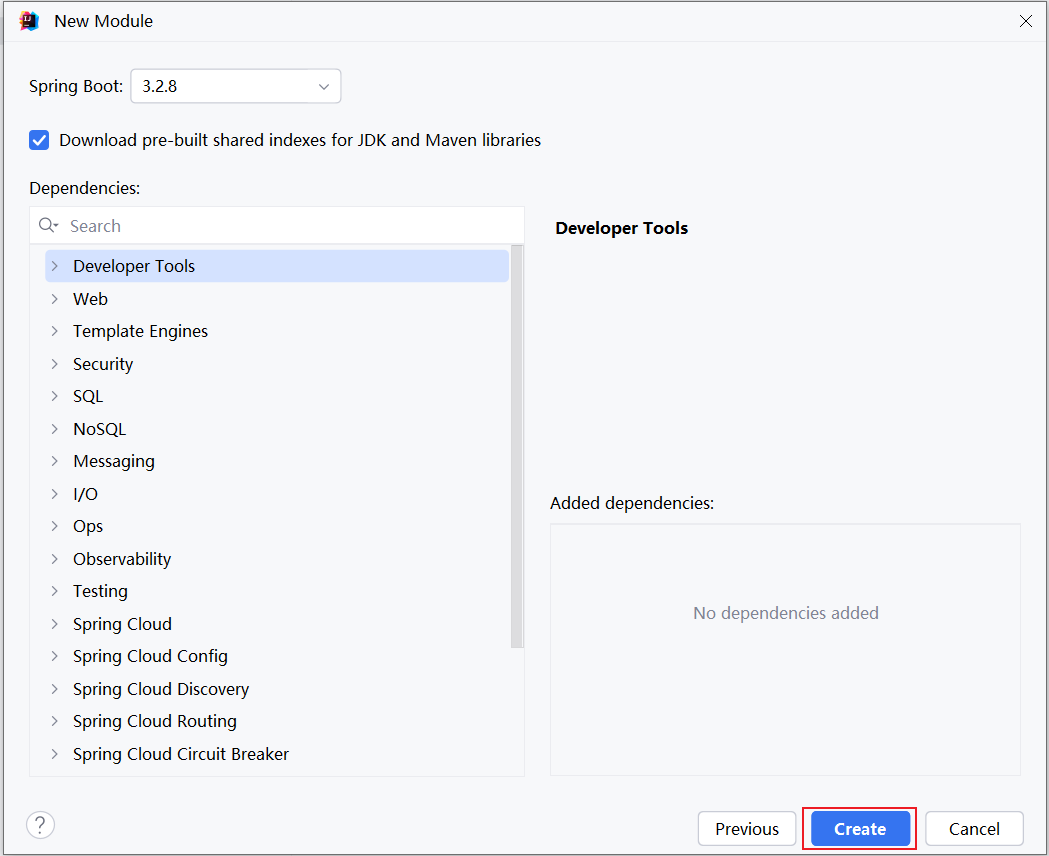
选择 springboot 的版本,不需要勾选任何的依赖。直接点击 create 创建项目
创建完 starter 模块后,删除多余的文件,只保留一个 pom.xml 文件。最终保留内容如下
pom.xml 中的配置如下
xml
<?xml version="1.0" encoding="UTF-8"?>
<project xmlns="http://maven.apache.org/POM/4.0.0" xmlns:xsi="http://www.w3.org/2001/XMLSchema-instance"
         xsi:schemaLocation="http://maven.apache.org/POM/4.0.0 https://maven.apache.org/xsd/maven-4.0.0.xsd">
    <modelVersion>4.0.0</modelVersion>
    <parent>
        <groupId>org.springframework.boot</groupId>
        <artifactId>spring-boot-starter-parent</artifactId>
        <version>3.2.8</version>
        <relativePath/> <!-- lookup parent from repository -->
    </parent>

    <groupId>com.aliyun.oss</groupId>
    <artifactId>aliyun-oss-spring-boot-starter</artifactId>
    <version>0.0.1-SNAPSHOT</version>

    <properties>
        <java.version>17</java.version>
    </properties>

    <dependencies>
        <dependency>
            <groupId>org.springframework.boot</groupId>
            <artifactId>spring-boot-starter</artifactId>
        </dependency>
    </dependencies>

</project>创建 autoconfigure 模块
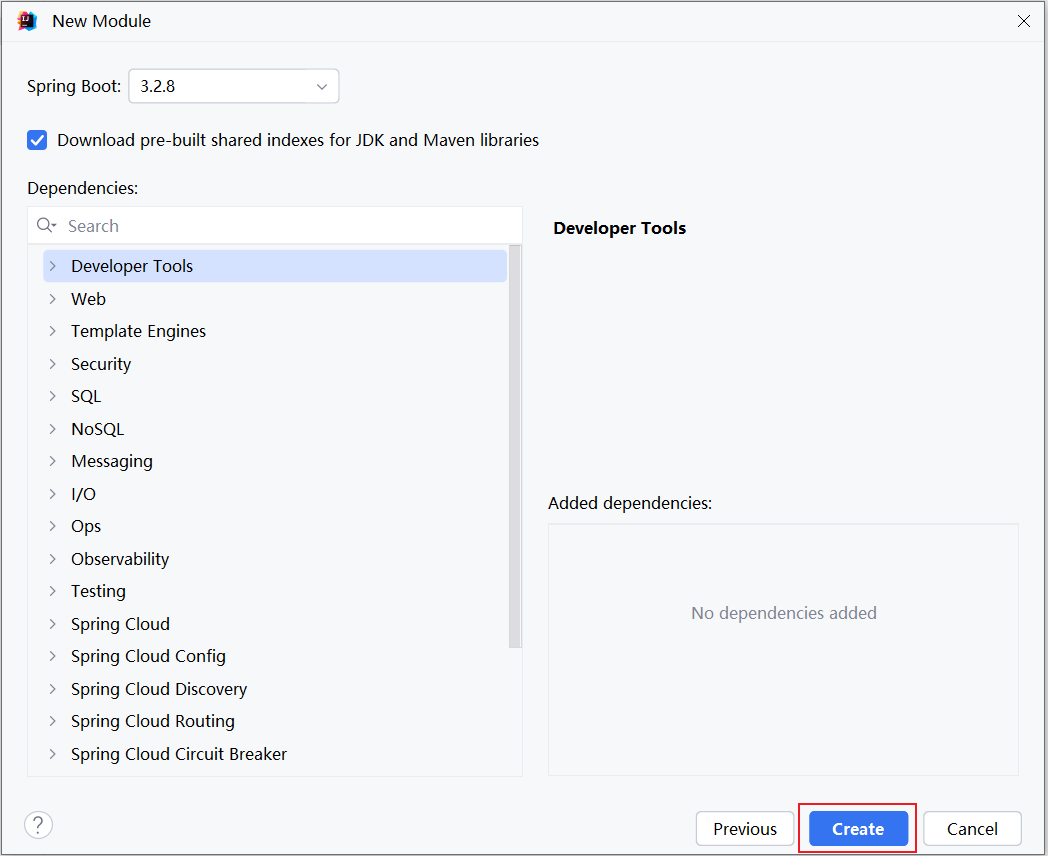
(2)创建 aliyun-oss-spring-boot-autoconfigure 模块
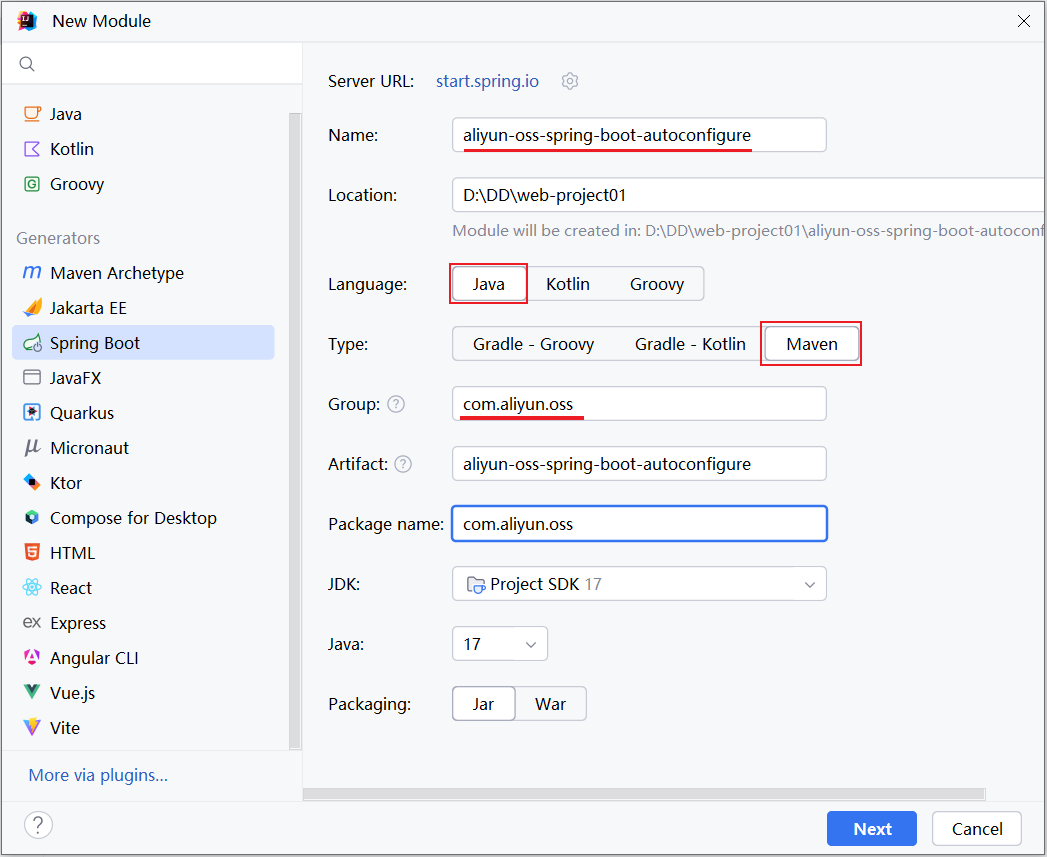
选择 Springboot 的版本,不用勾选任何依赖
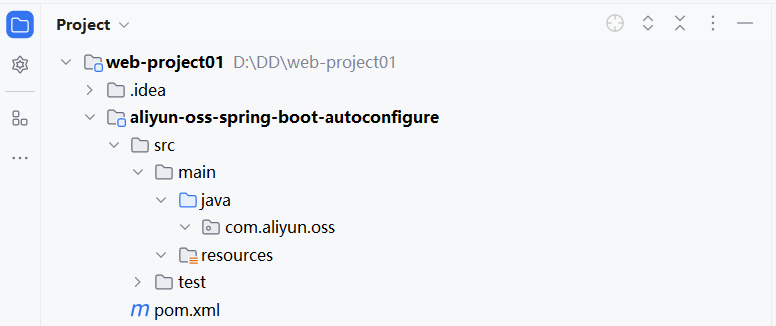
创建完 starter 模块后,删除多余的文件,只保留 src 和 pom.xml 。最终保留内容如下
该模块的 pom.xml 内容如下
xml
<?xml version="1.0" encoding="UTF-8"?>
<project xmlns="http://maven.apache.org/POM/4.0.0" xmlns:xsi="http://www.w3.org/2001/XMLSchema-instance"
         xsi:schemaLocation="http://maven.apache.org/POM/4.0.0 https://maven.apache.org/xsd/maven-4.0.0.xsd">
    <modelVersion>4.0.0</modelVersion>
    <parent>
        <groupId>org.springframework.boot</groupId>
        <artifactId>spring-boot-starter-parent</artifactId>
        <version>3.2.8</version>
        <relativePath/> <!-- lookup parent from repository -->
    </parent>

    <groupId>com.aliyun.oss</groupId>
    <artifactId>aliyun-oss-spring-boot-autoconfigure</artifactId>
    <version>0.0.1-SNAPSHOT</version>

    <properties>
        <java.version>17</java.version>
    </properties>

    <dependencies>
        <dependency>
            <groupId>org.springframework.boot</groupId>
            <artifactId>spring-boot-starter</artifactId>
        </dependency>
    </dependencies>

</project>按照我们之前的分析,是需要在 starter 模块中来引入 autoconfigure 这个模块的。打开 starter 模块中的 pom 文件
xml
<?xml version="1.0" encoding="UTF-8"?>
<project xmlns="http://maven.apache.org/POM/4.0.0" xmlns:xsi="http://www.w3.org/2001/XMLSchema-instance"
         xsi:schemaLocation="http://maven.apache.org/POM/4.0.0 https://maven.apache.org/xsd/maven-4.0.0.xsd">
    <modelVersion>4.0.0</modelVersion>
    <parent>
        <groupId>org.springframework.boot</groupId>
        <artifactId>spring-boot-starter-parent</artifactId>
        <version>3.2.8</version>
        <relativePath/> <!-- lookup parent from repository -->
    </parent>

    <groupId>com.aliyun.oss</groupId>
    <artifactId>aliyun-oss-spring-boot-starter</artifactId>
    <version>0.0.1-SNAPSHOT</version>

    <properties>
        <java.version>17</java.version>
    </properties>

    <dependencies>
        <dependency>
            <groupId>org.springframework.boot</groupId>
            <artifactId>spring-boot-starter</artifactId>
        </dependency>

        <dependency>
            <groupId>com.aliyun.oss</groupId>
            <artifactId>aliyun-oss-spring-boot-autoconfigure</artifactId>
            <version>0.0.1-SNAPSHOT</version>
        </dependency>
    </dependencies>

</project>自动配置
前两步已经完成了,接下来是最关键的就是第三步:在 aliyun-oss-spring-boot-autoconfigure 模块当中来完成自动配置操作
我们将之前案例中所使用的阿里云 OSS 部分的代码直接拷贝到 autoconfigure 模块下,然后进行改造就行了
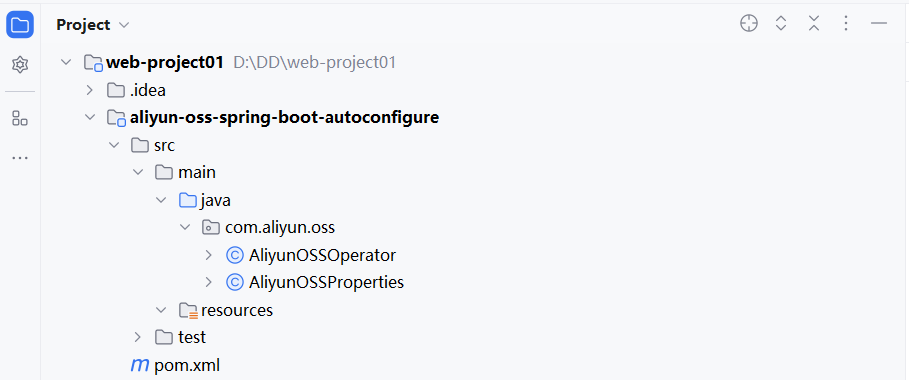
拷贝过来后,还缺失一些相关的依赖,需要把相关依赖也拷贝过来
xml
<?xml version="1.0" encoding="UTF-8"?>
<project xmlns="http://maven.apache.org/POM/4.0.0" xmlns:xsi="http://www.w3.org/2001/XMLSchema-instance"
         xsi:schemaLocation="http://maven.apache.org/POM/4.0.0 https://maven.apache.org/xsd/maven-4.0.0.xsd">
    <modelVersion>4.0.0</modelVersion>
    <parent>
        <groupId>org.springframework.boot</groupId>
        <artifactId>spring-boot-starter-parent</artifactId>
        <version>3.2.8</version>
        <relativePath/> <!-- lookup parent from repository -->
    </parent>

    <groupId>com.aliyun.oss</groupId>
    <artifactId>aliyun-oss-spring-boot-autoconfigure</artifactId>
    <version>0.0.1-SNAPSHOT</version>

    <properties>
        <java.version>17</java.version>
    </properties>

    <dependencies>
        <dependency>
            <groupId>org.springframework.boot</groupId>
            <artifactId>spring-boot-starter</artifactId>
        </dependency>

        <dependency>
            <groupId>org.projectlombok</groupId>
            <artifactId>lombok</artifactId>
        </dependency>

        <!--阿里云OSS-->
        <dependency>
            <groupId>com.aliyun.oss</groupId>
            <artifactId>aliyun-sdk-oss</artifactId>
            <version>3.17.4</version>
        </dependency>
        <dependency>
            <groupId>javax.xml.bind</groupId>
            <artifactId>jaxb-api</artifactId>
            <version>2.3.1</version>
        </dependency>
        <dependency>
            <groupId>javax.activation</groupId>
            <artifactId>activation</artifactId>
            <version>1.1.1</version>
        </dependency>
        <!-- no more than 2.3.3-->
        <dependency>
            <groupId>org.glassfish.jaxb</groupId>
            <artifactId>jaxb-runtime</artifactId>
            <version>2.3.3</version>
        </dependency>

    </dependencies>

</project>那此时,大家思考下,在类上添加的 @Component 注解还有用吗?
答案:没用了。 在 SpringBoot 项目中,并不会去扫描 com.aliyun.oss 这个包,不扫描这个包那类上的注解也就失去了作用
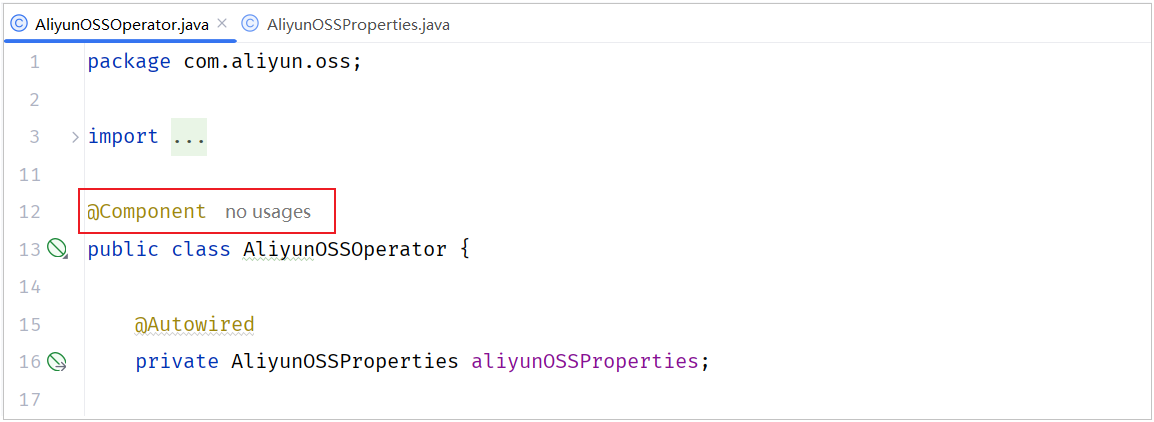
@Component 注解不需要使用了,可以从类上删除了
(1)删除 AliyunOSSOperator 工具类上的 @Component 注解 和 @Autowired 注解
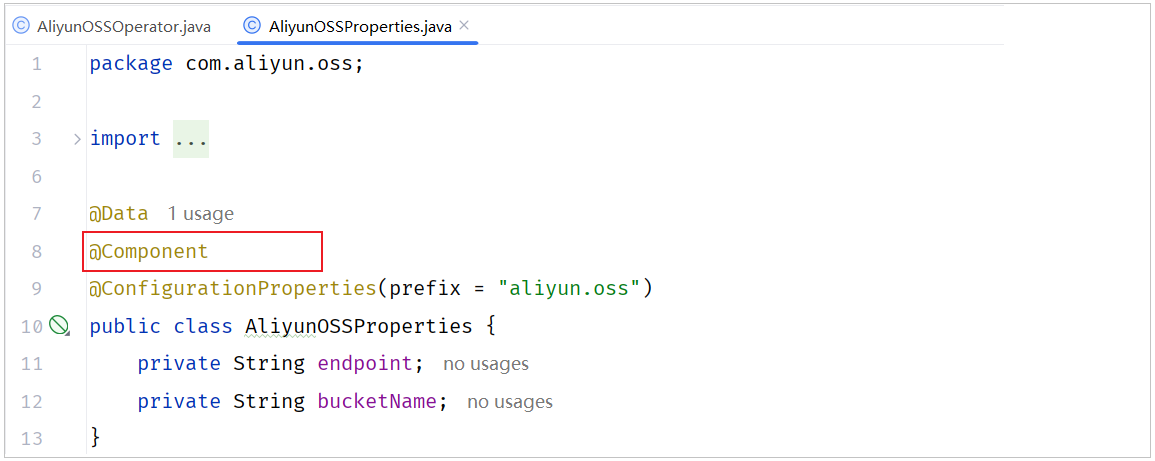
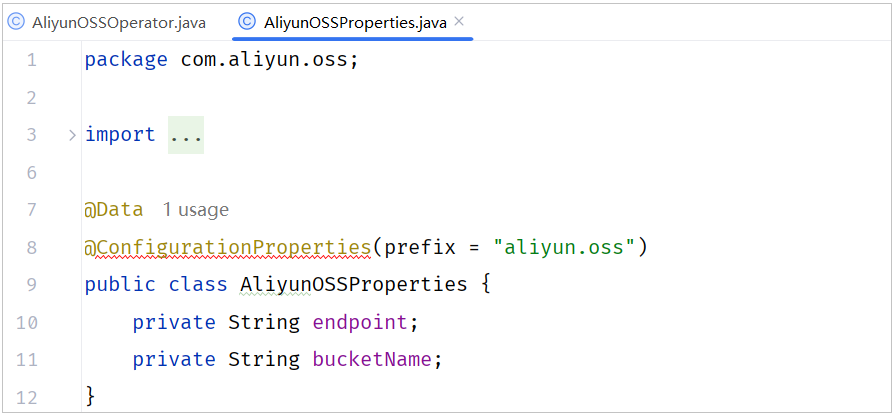
(2)删除 AliyunOSSProperties 实体类上的 @Component 注解
删除后报红色错误,暂时不理会,后面再来处理
(3)既然不能用 @Component 注解声明 bean,那就需要按照 starter 的定义规范,定义一个自动配置类,在自动配置类中声明 bean
下面我们就要定义一个自动配置类 AliOSSAutoConfiguration 了,在自动配置类当中来声明 AliOSSOperator 的 bean 对象
java
package com.aliyun.oss;
import org.springframework.boot.context.properties.EnableConfigurationProperties;
import org.springframework.context.annotation.Bean;
import org.springframework.context.annotation.Configuration;
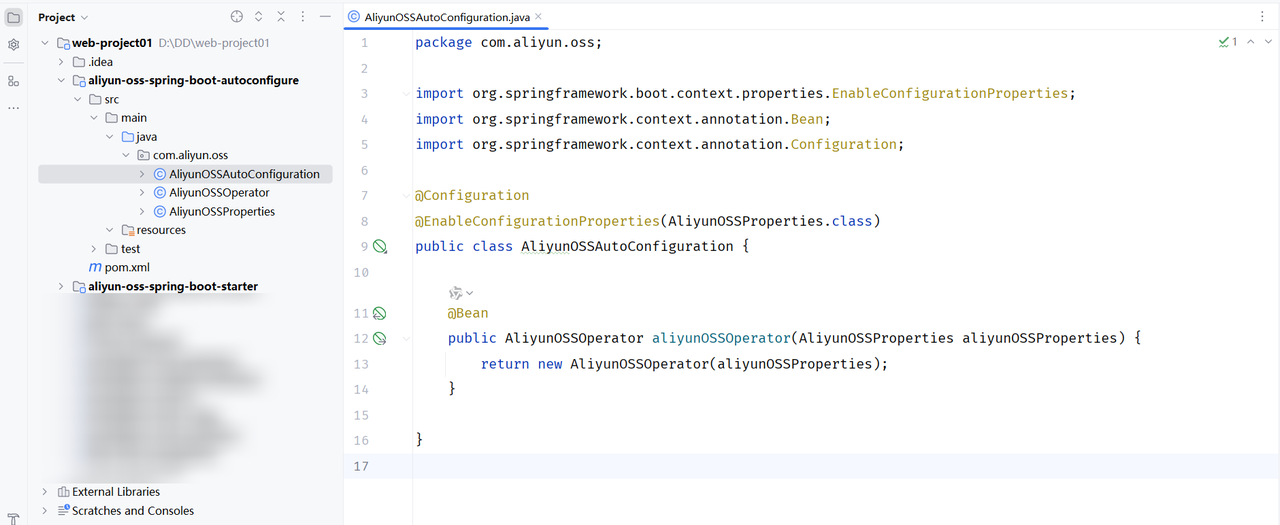
@Configuration
@EnableConfigurationProperties(AliyunOSSProperties.class)
public class AliyunOSSAutoConfiguration {
@Bean
public AliyunOSSOperator aliyunOSSOperator(AliyunOSSProperties aliyunOSSProperties) {
return new AliyunOSSOperator(aliyunOSSProperties);
}
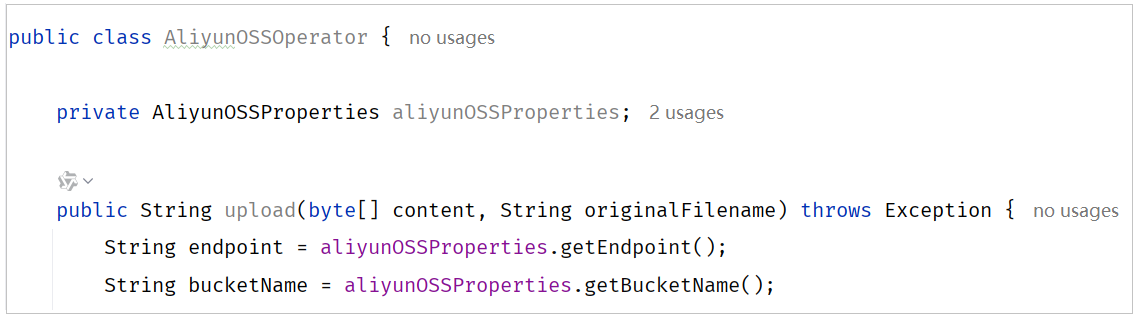
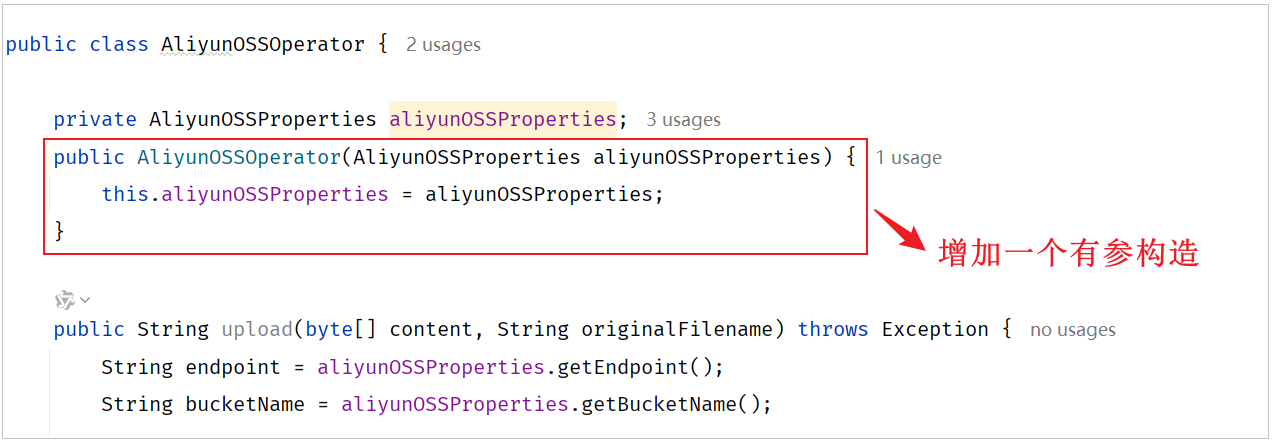
}AliyunOSSOperator 的代码中需要增加一个有参构造,将 AliyunOSSProperties 对象传递给工具类。代码改造如下
(4)在 aliyun-oss-spring-boot-autoconfigure 模块中的 resources 下,新建自动配置文件 META-INF/spring/org.springframework.boot.autoconfigure.AutoConfiguration.imports
将自动配置类的全类名,配置在文件中,这样在 springboot 启动的时候,就会加载到这份文件,并加载到其中的配置类了,配置内容如下
yml
com.aliyun.oss.AliyunOSSAutoConfiguration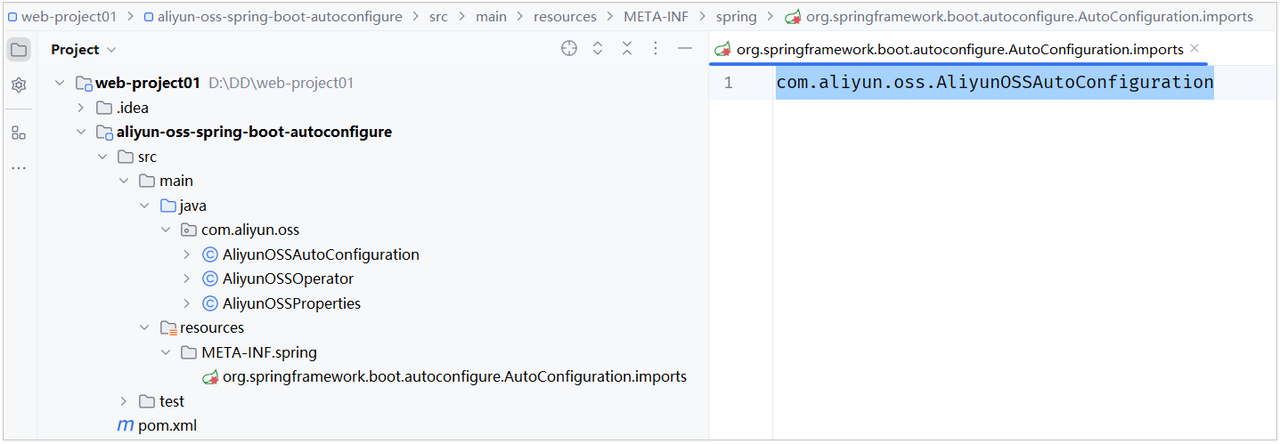
到此呢,这个 aliyun-oss-spring-boot-stater 就定义好了,哪里要想使用,就可以直接导入依赖,直接注入使用了
测试代码
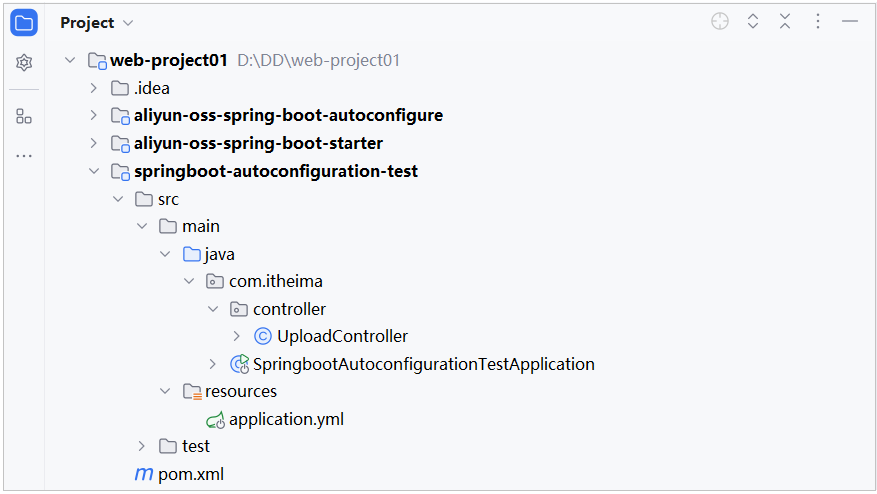
今天的课程资料当中,提供了一个自定义 starter 的测试工程。我们直接打开文件夹,里面有一个测试工程。测试工程就是 springboot-autoconfiguration-test,我们只需要将测试工程直接导入到 Idea 当中即可
(1)在导入的 test 工程中引入阿里云 starter 依赖
xml
<dependency>
    <groupId>com.aliyun.oss</groupId>
    <artifactId>aliyun-oss-spring-boot-starter</artifactId>
    <version>0.0.1-SNAPSHOT</version>
</dependency>(2)在导入的 test 工程中的 application.yml 中配置阿里云 OSS 的配置信息
yml
aliyun:
  oss:
    endpoint: https://oss-cn-beijing.aliyuncs.com
bucketName: java422-web-ai(3)在 test 工程中的 UploadController 类编写代码
java
package com.itheima.controller;

import com.aliyun.oss.AliyunOSSOperator;
import org.springframework.beans.factory.annotation.Autowired;
import org.springframework.web.bind.annotation.PostMapping;
import org.springframework.web.bind.annotation.RestController;
import org.springframework.web.multipart.MultipartFile;

@RestController
public class UploadController {

    @Autowired
    private AliyunOSSOperator aliyunOSSOperator;

    @PostMapping("/upload")
    public String upload(MultipartFile image) throws Exception {
        //上传文件到阿里云 OSS
        String url = aliyunOSSOperator.upload(image.getBytes(), image.getOriginalFilename());
        return url;
    }

}